June 5, 2001
revised Nov. 9, 2002 (added Peter K's
method)
There are several approaches for fixing the infamous seat-back twist. What happens is either the outer sheath of the drive cable(s) stretches or the inner cable shortens due to wind-up and it disengages either at the motor or at the worm drive for the seatback. It can be repaired with the seat either in or out of the car. Since it was my first attempt, I took the seat out & worked on it upsidedown on a pad. I'll reference two url's from the bimmer.org archives for this with due credit to the original authors:
Bimmer.org 7 series archive, 1999 week28
and
Bimmer.org 7 series archive, 1999 week 35
I used the method where you heat the metal thimble to pull it off, cut a length of the tube off & heat the thimble to fuse it back on again. I don't recommend the method where you insert a stub length of coat hanger or nail since with that method, it guarantees that one end or the other will have a minimum amount of engagement & may only be a temporary solution but I understand it works well for the headrest fix.
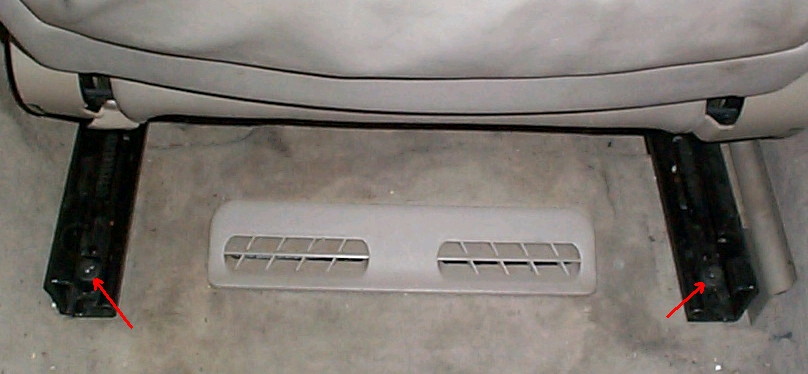
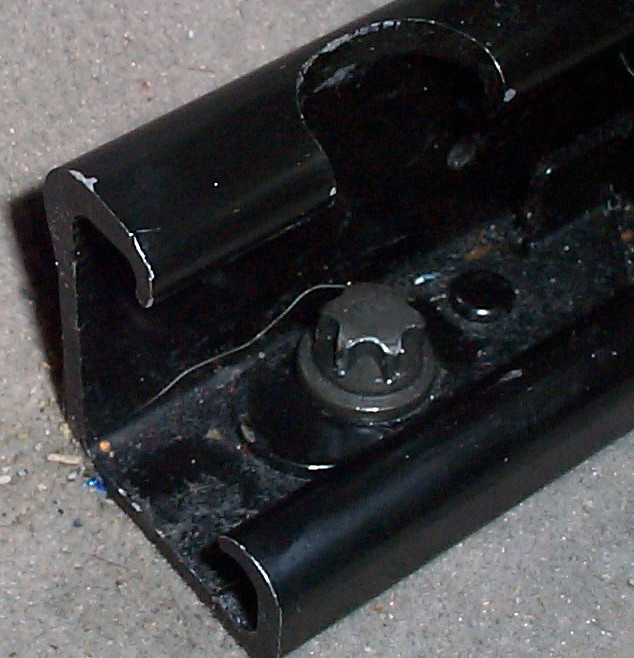
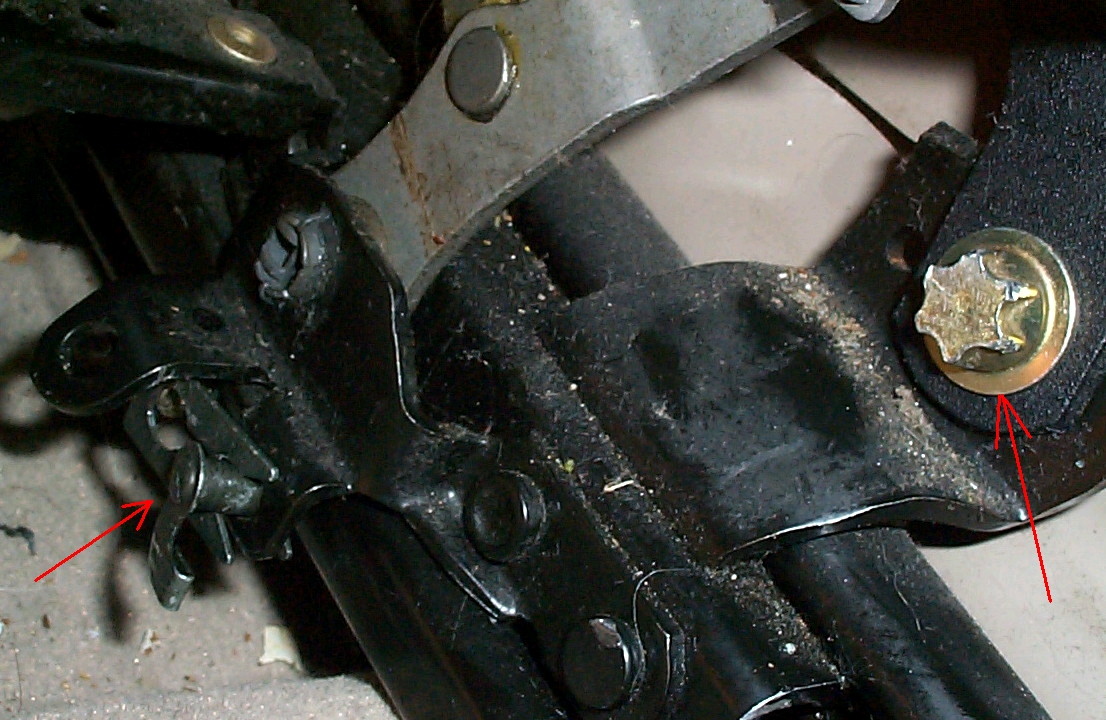
Getting the seat out is straight forward: pop the headrest out, slide the seat forward, remove the two Torx bolts Photo-1 & Photo-1a in the rear & tilt the seat forward to disengage the front hooks Photo-1b. A 7/16 or 11 mm 12-point socket fits the Torx heads if you don't have a Torx "E14" socket. Remove the seatbelt bolt (also Torx E14) and unclip the clevis pin for the slender seatbelt shoulder height adjuster wire Photo-2 and let it hang free. Unplug the wire harness & the seat is free to come out. I'm not sure about later models, but you might have to disconnect the battery if the seat is wired to the SRS to avoid tripping a fault in the SRS memory which requires a trip to the dealer to reset (also have radio code handy if you disconnect the battery). My passenger seat doesn't trip the SRS, but I don't know about the driver's seat (92 735i).
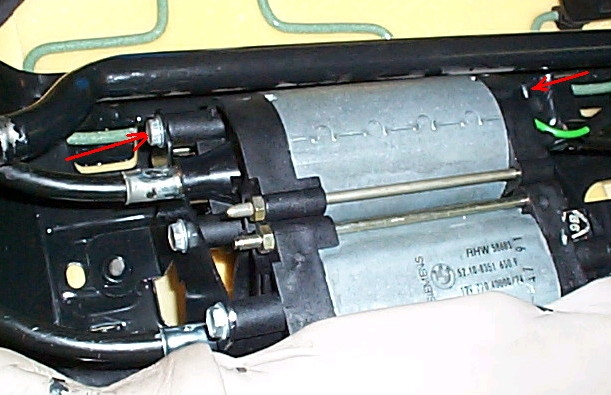
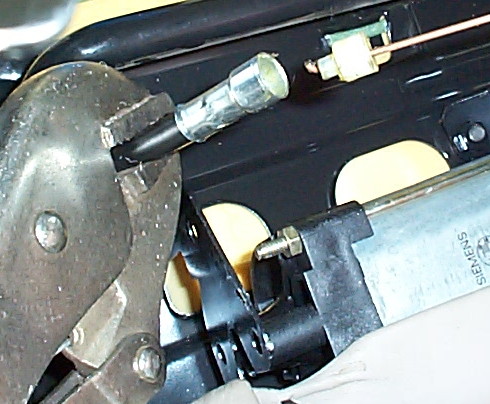
With the seat out, the front-most motor drives the seatbottom height adjustment, the motor just behind it drives the seatback tilt. remove one screw Photo-3 on each end of the motor & pivot the motor slightly to clear the metal cable ends & pull the cables straight out Photo-4, This photo is with the rear motor completely removed but it doesn't have to come all the way out. DON'T try to force the cable ends out without removing the motor screws.
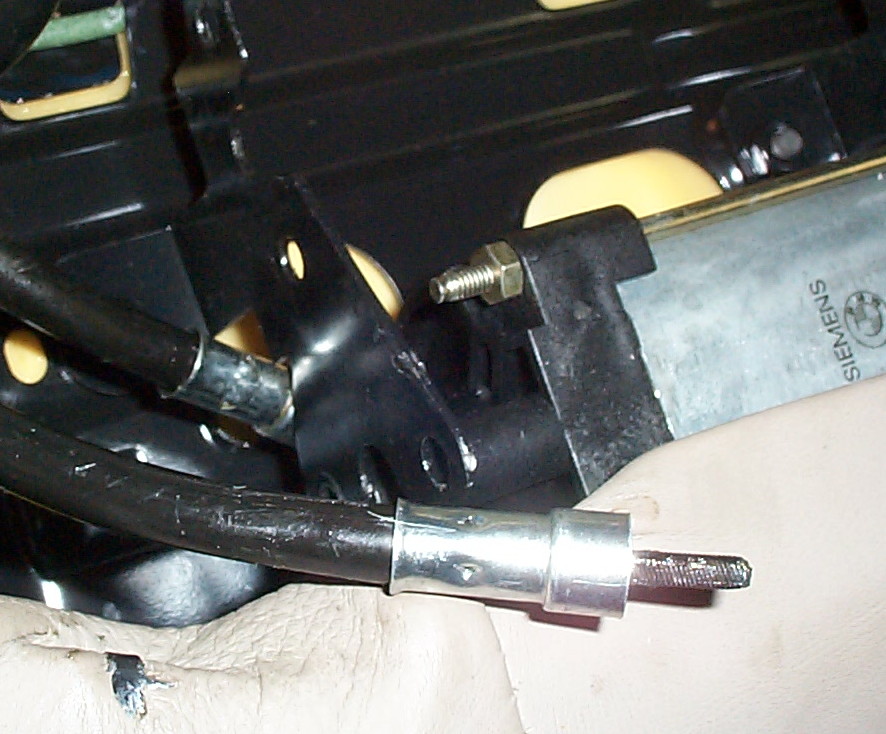
The drive cable is just like a speedometer cable with square ends. With the inner cable fully pushed in, the motor end should stick out about 1/2" to 5/8", one of mine was barely flush with the end. To shorten the outer sheath, pull the inner cable out, use a wire hook Photo-5 & remove the white nylon bushing, & heat the metal end with a propane torch on a low flame, or with a cigarette lighter, for a maximum of 8 to 10 seconds & pull the thimble off with a pair of pliers. Cool the nylon tube and cut about 3/8" off the end of it. Heat the thimble for 5 seconds & slide it back on fully to the depth of where the nylon bushing bottoms out, and chill it with an icecube.
Grease the inner cable lightly & put it back in & reinsert the nylon bushing. Check that the cable end doesn't stick out beyond 5/8", if it's too long, it's better to heat the thimble & pull it out a little than to try to shorten the square end of the cable. I used a cordless drill to power the cable to get the alignment right again, moving it by hand is slow with no visible results. Go easy with the torque. I couldn't hit on an exact method to get it lined up precisely so I just eyeballed it. Once the seat is back in the car, you can adjust both seats the same & the lobes of the lower back side bolsters should all be in line.
Probably the easiest & quickest way to fix it & the seat doesn't have to be remove, is to raise it all the way up & determine which cable(s) is involved & cut & splice the outer sheath, removing a 1/4" or so chunk & then butting the ends back together with a short length of fuel hose & hose clamps. Ref. Photo-6. Use a razor blade or sharp knife & make sure you only cut the outer plastic sheath & not the inner metal cable.
Here's another method posted recently by "Imack" on the 7 board: instead of fooling with removing the motor screws, simply heat either of the thimble ends in place & pull the outer sheath out of the thimble, cut off the appropriate 1/4" or so & heat it & slide it back in. Just make sure to line the seat back up before reinserting the sheath. If you can raise the seat enough to get to it, you might even be able to apply the fix without removing the seat.
Yet another method, submitted by Peter K:
"So here's how I solved the problem. - I made the inner cable longer. When you have the cable on the workbench, pull out the inner cable. Clamp the square end vertically in your vice with the end about 4 mm proud of the vice. With a MIG welder, weld a spot on the end, let it cool, then another spot on top, let it cool, then another spot on top, and so on, until you reach the desired length. When cold, clamp the cable horizontally in the vice and file your weld back to a square. Reassemble and fit back in seat. It is important that the job is done in a vice, as the vice will take up excess heat, which could damage the flexi part of the inner cable."
Re-assembly is reverse order of above. This will also work for the seat bottom height/tilt adjustment if it falls victim to the same malady.
gale, 92 735i
Back to Automotive repair page