revised 3-17-02
Bentley's E32 manual led me astray. The change can be made much simpler:
First: DO NOT REMOVE THE GLOVEBOX!!! you'll greatly increase the time it takes to do the job & can easily mess up the glovebox alignment further complicating re-assembly, and only gain a marginal amount of improved access & field of view.
Tools: long slender T-20 Torx driver, Phillips screwdriver, 8 mm & 10 mm socket wrenches, inspection mirror, short wire "S" hook. BMW microfilter part no. 64 31 1 390 836 (verify for your model & year) about $27 US at the dealer.
Tips: It’s actually easier to do the job at night with a droplight. Too much daylight makes it harder to see. Also, I would assume the dealer does the job on a lift with the car partially elevated and that would make for easier mobility.
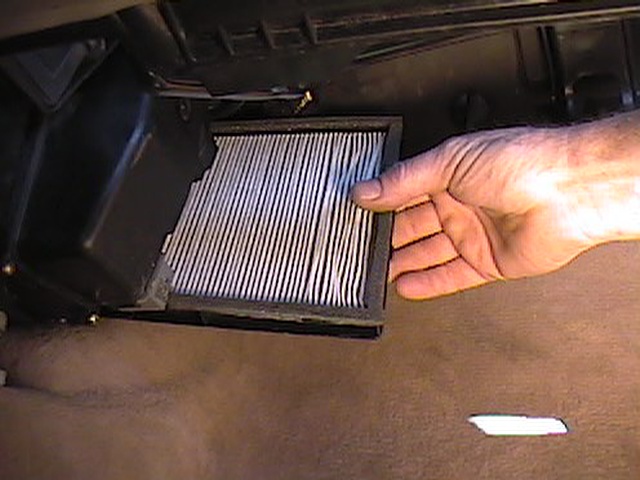
1. Open the glove box and pull it toward the passenger seat. It glides outward like a drawer on a double-jointed (4-bar link) mechanism. It does NOT have to be removed!!! (Ref. Photo-1).
2. Unclip the top edge of the rear glovebox liner and fold it out of the way into the glovebox.
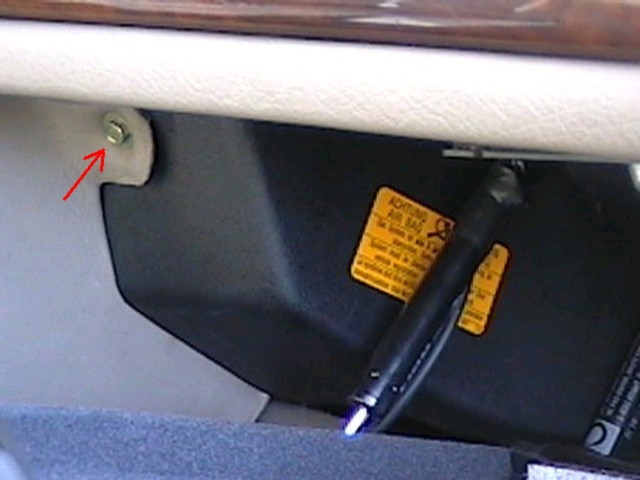
3. Remove the 8 mm hex screw in the upper left corner of the glove box opening. (Ref. Photo-2).
4. Remove the carpet panel above the tunnel, (Ref. Photo-3a & Photo-3b).
5. Pry off the flat-head plastic clip on the slotted hole on the forward end of the black plastic cover which has an orange "Attention Air Bag" label. (Ref. Photo-4, center of image) and remove this cover. The footwell air duct is now exposed.
6. There are 3 phillips screws which attach the air duct, one on a tab above the 90 degree corner of the tube and 2 above the passenger’s feet. The duct will pull down and away from its socket at the right air flap near the stepper motor near the front of the glovebox opening. This shouldn't require much force. Things will start resembling Bentley's photo. The A/C evaporator coil cover does not need to come off as shown in his photo. He must have had it exposed for another purpose.
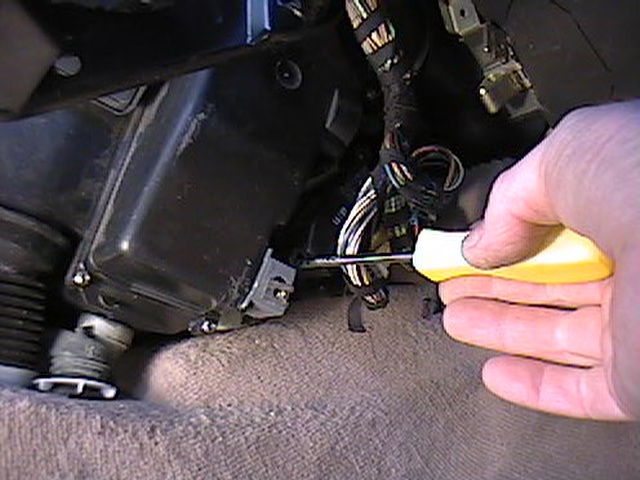
7. Push the wiring harness forward and unplug the small connector on top of the "sword". Squeeze the front and back of the plug to release the clips. It pulls straight up and off (Ref. Photo-5). A small wire "S" hook will hold the harness out of the way if hooked into a nearby bracket.
8. Remove the sword (Ref. Photo-6). There are 2 Torx (T-20) screws down in deep black plastic sockets. You'll need a slender screwdriver-type Torx driver (the 1/4" hex bit-driver style won't fit down the recess without butchering the plastic end of the sword). The sword will now slide out and resemble it's name (Ref. Photo-7a & Photo-7b & Photo-7c) See bottom of page for more details on the sword.
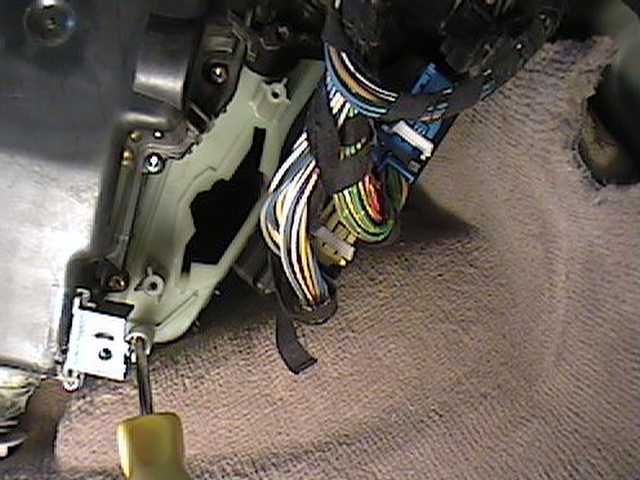
9. Remove the Torx screw at the bottom of the pale green plastic cover (Ref. Photo-8a). Twist the upper latch of the filter cover approx. 90 degrees counter-clockwise, it's the large (approx. 1.25") black plastic piece with two rippled thumb paddles which latch into notches (Ref. Photo-8b). Twist it until the thumb paddles are nearly vertical. A 10 mm socket will fit nicely on the center of the latch to get more leverage but remember, it's just plastic so don't torque too hard on it or the center hex boss will snap off (ask me how I know!). It clicks into detents when secured. Rattle the cover and cock it slightly and it will come out. Try to get it to slide downward but don’t force it. Getting this cover off is by far the most difficult part of the whole job.
10. The filter is now exposed and will slide out with the wire harness lifted up to clear the top corner (Ref. Photo-9). There's another enclosed black plastic flat component in front of the filter element to which the rest of the wire harness is still attached. There's a clip on the middle left of this piece which can be squeezed & it will slide out slightly if that makes things easier. Don't try to remove it all the way, it has a wire harness attached to it at the its other end, in the left footwell behind a similar carpeted cover. It pops back in place easily if accidentally dislocated.
11. Vacuum out any debris and reverse assembly with new filter. The second most difficult part is getting the green plastic cover/sword holder back in place. When re-installing the duct elbow, it helps to position a flashlight in the glovebox for better lighting. It will go back on without too much force, you might have to rotate it back and forth a little bit. Double check that it’s seated properly or else it will bind or interfere with the stepper motor driven airflap.
My local dealer charges 1 hr labor ($70.00) + filter for the change. You might decide to skip this unpleasant chore & let the dealer do it. If you do take it to the dealer, make sure the glovebox is lined up properly before you pay up. I hope this summary helps if you choose to do the job yourself. It shouldn't take more than 20 minutes the next time.
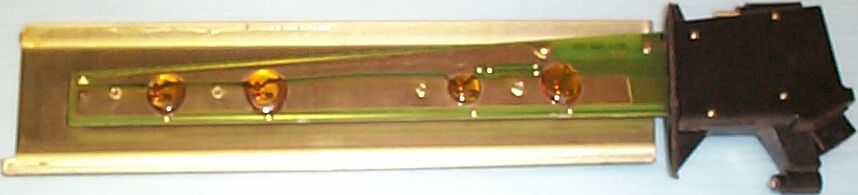
More info on the sword: Sword failures can cause the blower to run on high speed only. What usually happens is the MOSFETs get fried, the large aluminum blades are their heatsink. Here's a jpeg showing 2 of the 4 MOSFETs (Photo-10) They're heavily potted in epoxy. There's a detailed instruction on Bruno's e34 page for replacing them but success seems to be a 50/50 crap shoot from others' feedback. New swords are about $150 at Eurasian: 1-800-824-8814 & rebuilt ones can be found at Programa, they also show up on Ebay occasionally.
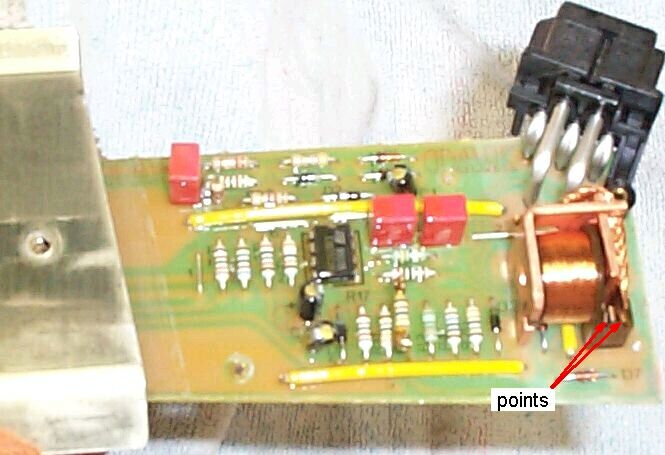
At the end of the handle of the sword, there is a relay for the highest speed blower setting. The black plastic cover comes off with 4 small phillips head screws & one larger one on the other side (Photo-11). The points can be sanded with a narrow strip of fine sandpaper (say 600 grit or finer silicone carbide wet-or-dry) & cleaned with a business card & some contact cleaner or WD-40.
gale, 92 735i