12-29-2001
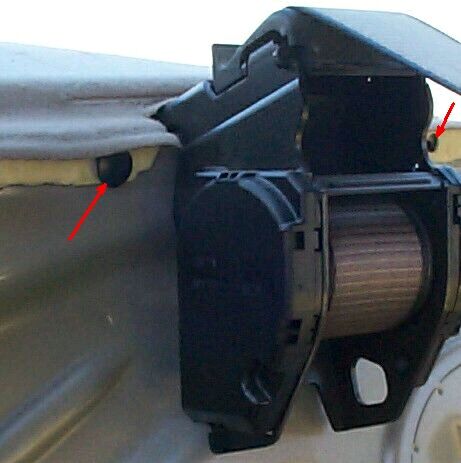
If using new Bilsteins, the fine print says to store them vertically or to have them installed for 24 hours before driving, so set them upright the night before. The rear seatback has to come out to get access to the top nuts when replacing the rear shocks. Click here for more info on that. With the seat back removed, pry out the 4 plastic rivets on the front edge of the rear shelf.
The rear shelf does not need to be removed as Bentley's says. It will lift up slightly to provide necessary access to do the job with the shelf in place.

Pry out the rubber sound deadening cover.
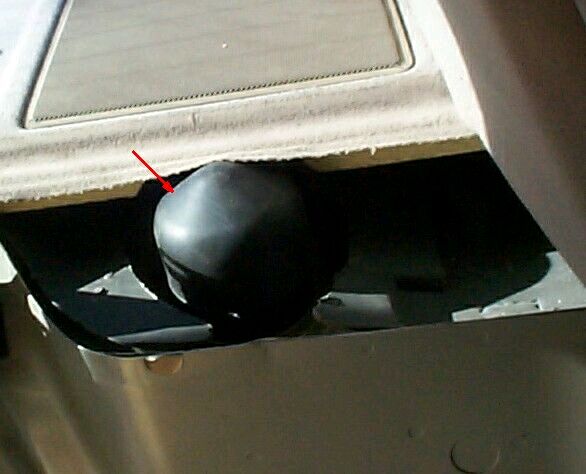
Pry off the rubber dust cover.

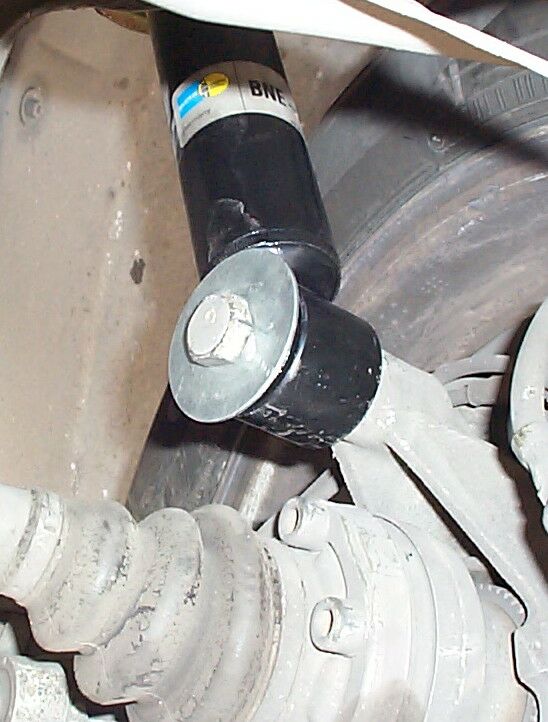
Remove the nut on the top of the shock rod.

It will require 2 wrenches to keep the shaft from spinning. The hex nut is a 17mm or an 11/16" will work. Do one side at a time.
Chock the front wheels & lift the rear wheels off the ground & place the rear on jackstands. Loosen the 22mm (7/8") bolt on the end of the lower shock mount but don't remove it all the way just yet. I had mine raised with the wheels hanging before removing the top shock mounting nut. Also, my old springs were a bit sagged out so they didn't have much stored energy at this stage. A spring compressor may be necessary. My old rear springs were sagged out & did not require one, but be careful & be prepared for the shock to drop down when removing the bolt. I did one side at a time & installed the new spring/shock assembly before moving on to the other side.
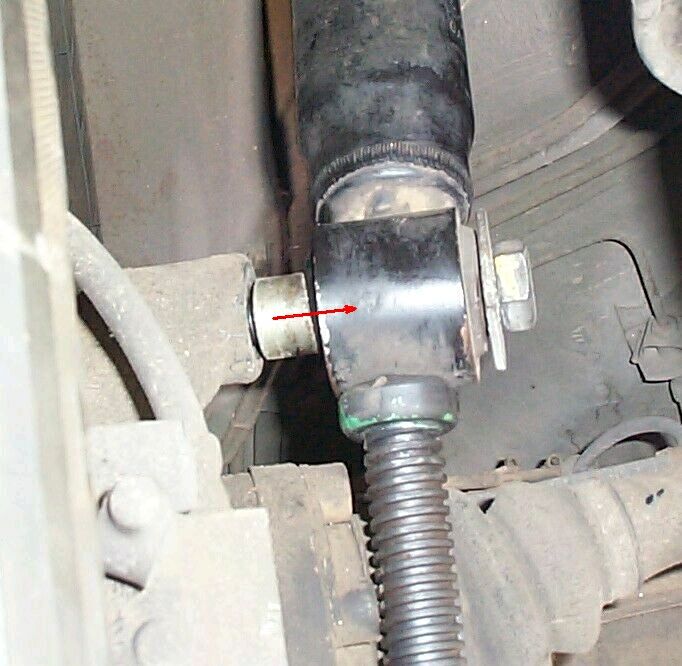
Support the bottom of the "eye" with a bottle jack & work the sleeve out of the casting socket by prying itout with reverse pliers or a large screwdriver. Again, be careful when finally removing the bolt.
The entire shock/spring assembly will drop out easily. The upper rubber spring cushion may remain stuck to the underside of the shock tower. It can stay in place or will pry out easily.

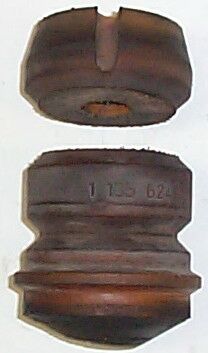
The top & bottom cushions are different so make sure they go back in the right place.

OEM Boge on left, Bilstein "Tourings" center & right. The Bilsteins come with a separate lower spring seat flange & it slides over the top of the shock tube & rests on the welded support ring. It may require a little tapping with a hammer & a block of wood to get it over the 1st 1/4" to 1/2" but will slide easily down the rest of the way. Put the lower rubber cushion on the seat & place the spring in position. The new Bilsteins come with a plastic cap that I wasn't sure what to do with so I tapped it into place on the top of the shock tube.
The Bilsteins rears didn't come with instructions so I'm not exactly sure what to do about the bump stop. The Bilstein fronts have internal bump stops so I'm inclined to think the rears may have them also, but my old Boge's showed clear signs of wear on the lower bump stop disk surface so I cut off & used the shorter top 1/3rd of the old ones & used that as a bump stop for the Bilsteins just in case. If I were keeping the stock springs, I would re-use the stock bump stops, but since I put lowering springs on it, I felt the need to cut them down.


Here's a side-by-side comparison of a stock spring with a Bav Auto lowering spring. The Bav Auto spring is about an inch shorter. They both have the same number of coil turns & look to have the same coil diameter & wire gauge so should have about the same spring constant.

The new Bilstein's didn't come with a boot/dust cover. The old Boge dust covers don't fit without the larger lower portion of the bump stop with the ridge, so I went ahead & assembled it without a dust cover. I will go back & redo the job with these universal boots which I found at Checker's for $4.79 ea. I'll post an update when I get them in. They even come in "Bilstein Blue"!
Slide the shock/spring unit back in place, with the rubber spring cushions & make sure they're seated correctly at the coil ends. Assemble the upper mounting plate & nut & tighten it until the nut bottoms out. The torque spec is 16 ft-lb.
For the lower mount, you'll notice that the OEM Boge has an integral washer which prevents the rubber center bushing from pulling through the "eye" (not that it ever would). The new Bilstein's didn't come with one so I used a large flat washer to take its place. Torque the bolt to 94 ft-lb. I don't like assembling without a washer. One of my prof's in college had a buddy killed on the track when the spherical center bushing pulled out of a radius arm & he lost control control of his car & crashed. A simple 2 cent washer would have kept it in place & saved his life! Think about stuff like this when faced with an installation decision & DIY work in general.
Click here to go to the Front Strut insert page
gale, 92 735i